Creating an HTTPS ingress controller with your own TLS certificate and with public static IP on AKS

I used to be a .NET developer. Nowaways, I am a DevOps solutions architect with a focus on Azure and Kubernetes.
I also love productivity topics, especially when it comes to doing more with less of my time. I'm also a daddy, so time is a limited resource for me.
Microsoft already has good documentation on configuring an NGINX ingress controller with Let’s Encrypt or your own SSL certificate. There’s no guidance on creating an HTTPS ingress with your own certificate and using a public static IP for the ingress controller. This is important because many companies/enterprises already have certificates for applications and/or are not ready for Let’s Encrypt. Also, in some organizations requesting an A record on a DNS provider can take some time, so it’s more convenient to have static IPs for assurance that environments won’t break if AKS clusters have to be re-created.
In this post, I’ll guide you through acquiring a free certificate, then uploading it to Kubernetes, setting up the ingress controller with a static IP, configuring DNS, then defining the ingress route for a sample application, then verifying everything works.
Pre-requisites
- You have a domain or access to one.
- You can verify the ownership of the domain or have an SSL certificate and its private key.
First, the certificate.
If you don’t have a certificate, you can either use a self-signed certificate or use a free and trial certificate from a certificate authority. If you already have a certificate, you can skip to the next section.
Here’s how you can get a free certificate from Comodo, a popular certificate authority.
Go to https://ssl.comodo.com/free-ssl-certificate.
Choose the domain for your application. In my case, I will be using https://my-app.gaunacode.com.
Sign up for an account and fill out your information. You don’t have to provide your credit card.
View the certificate and choose “Setup ssl.comodo.com SSL Certificate.”
You will be asked for a Certificate Signing Request (CSR).
Here’s how to create one with Open SSL.
# Create the private key. You will need this later.
openssl genrsa -out my-app-gaunacode.key 2048

# Create a CSR from the private key
openssl req -new -key my-app-gaunacode.key -out my-app-gaunacode.csr

# View the CSR
cat my-app-gaunacode.csr
Copy the CSR and paste it into the textbox from Comodo.
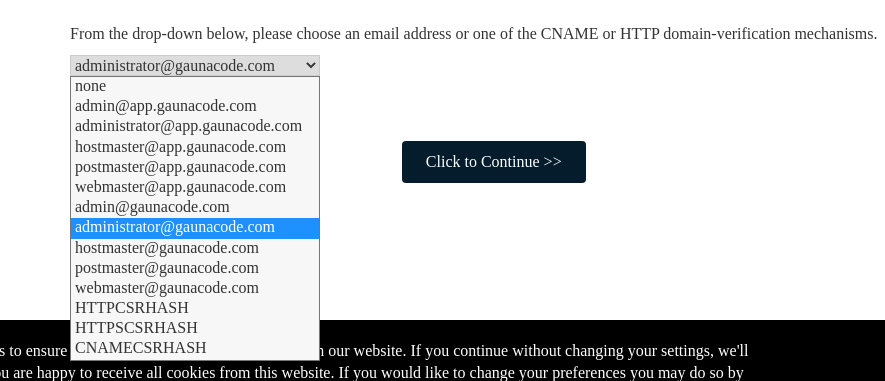
Then, Comodo will ask you to choose a method to verify the ownership. I chose email verification. If you try CNAME verification, you might have trouble with it as I did. With email verification, I had to set-up an email distro at [email protected] using my GSuite account.
Then, I verified my domain and received an email from Sectigo (Comodo).
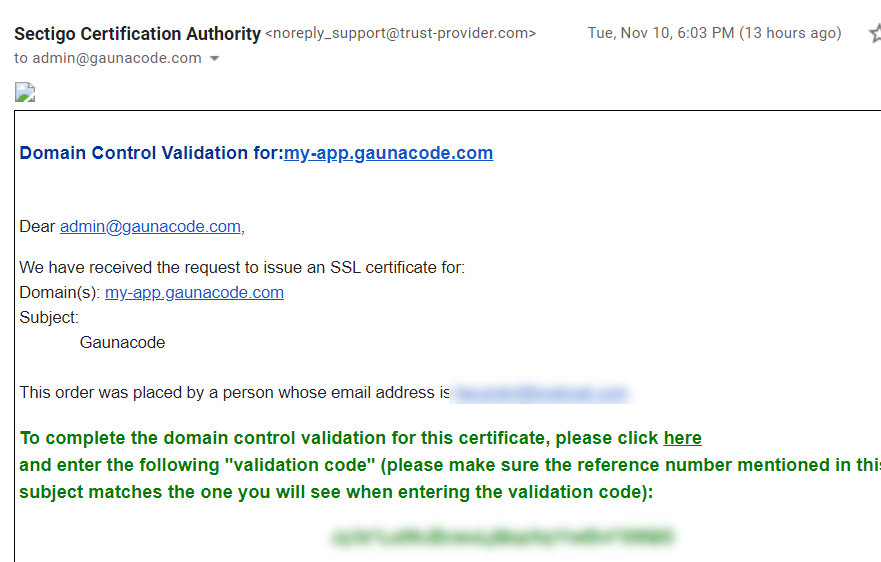
Once I verified, I received my SSL certificate in an email.
Setting up the ingress
Now that you have a certificate, you can get to the fun part. First, create a public static IP using the Azure CLI. Create it on the same resource group where the node pools reside so that AKS has enough permissions to modify the resource. Alternatively, you can grant Network Contributor rights to the AKS service principal and create the public IP in any resource group of your choice.
az aks show --resource-group my-resource-group --name my-cluster --query nodeResourceGroup -o tsv

az network public-ip create --resource-group MC_my_nodepool_resource_group --name my-ip-name --sku Standard --allocation-method static --query publicIp.ipAddress -o tsv
The last command will give you the static public IP address. Copy it. In my case, it was 52.146.67.3.
Now, create a namespace to place the NGINX ingress controller.
kubectl create ns ingress
Then, deploy NGINX using a Helm chart. If your cluster is RBAC enabled with Azure AD, then set rbac.create=true. Choose a name for the DNS label on the public static IP address. I chose the same name as the Azure public IP resource. Set this DNS label on the last parameter (controller.service.annotations."service\.beta\.kubernetes\.io/azure-dns-label-name")
helm repo add ingress-nginx https://kubernetes.github.io/ingress-nginx

helm install nginx-ingress ingress-nginx/ingress-nginx \
    --set rbac.create=false \
    --namespace ingress \
    --set controller.replicaCount=2 \
    --set controller.nodeSelector."beta\.kubernetes\.io/os"=linux \
    --set defaultBackend.nodeSelector."beta\.kubernetes\.io/os"=linux \
    --set controller.service.loadBalancerIP="[your public static ip address]" \
    --set controller.service.annotations."service\.beta\.kubernetes\.io/azure-dns-label-name"="[dns label]"
Once the ingress controller deploys, it shouldn’t take long because you can check the deployment.
kubectl --namespace ingress get services -o wide -w nginx-ingress-ingress-nginx-controller
Verify that the External IP address should be the same as the public static IP.
NAME                                     TYPE           CLUSTER-IP    EXTERNAL-IP   PORT(S)                      AGE   SELECTOR
nginx-ingress-ingress-nginx-controller   LoadBalancer   10.0.64.221   52.146.67.3   80:31148/TCP,443:32641/TCP   13m   app.kubernetes.io/component=controller,app.kubernetes.io/instance=nginx-ingress,app.kubernetes.io/name=ingress-nginx
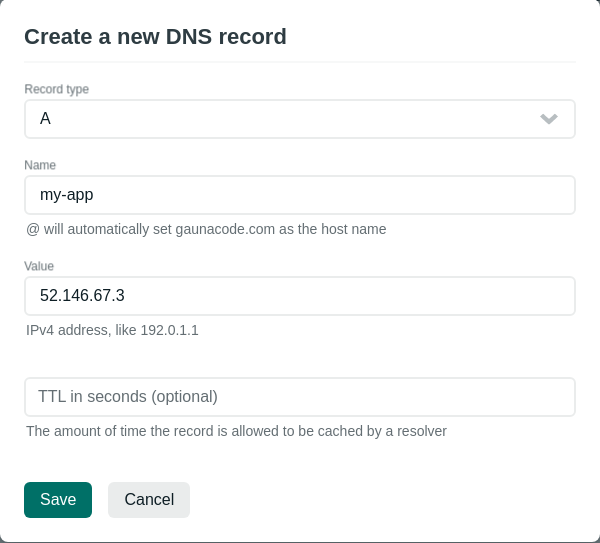
Create an A record from your domain to the public IP. For example, I am using Netlify DNS. Give it some time for the DNS change to propagate.
Next, let’s verify that ingress works with two sample applications.
Create a namespace for the sample app we will use.
kubectl create ns ingress-test
Deploy the SSL certificate on the namespace as a Kubernetes secret. Notice how it’s deployed on the same namespace as the application to be deployed.
kubectl create secret tls aks-ingress-tls \
    --namespace ingress-test \
    --key my-app-gaunacode.key \
    --cert my-app_gaunacode_com.crt
Deploy the first sample application on the ingress-test namespace.
cat <<EOF | kubectl apply -f -
apiVersion: apps/v1
kind: Deployment
metadata:
  name: aks-helloworld
  namespace: ingress-test
spec:
  replicas: 1
  selector:
    matchLabels:
      app: aks-helloworld
  template:
    metadata:
      labels:
        app: aks-helloworld
    spec:
      containers:
      - name: aks-helloworld
        image: mcr.microsoft.com/azuredocs/aks-helloworld:v1
        ports:
        - containerPort: 80
        env:
        - name: TITLE
          value: "Welcome to Azure Kubernetes Service (AKS)"
---
apiVersion: v1
kind: Service
metadata:
  name: aks-helloworld
  namespace: ingress-test
spec:
  type: ClusterIP
  ports:
  - port: 80
  selector:
    app: aks-helloworld
EOF
Now, deploy the second sample application also on the same namespace.
cat <<EOF | kubectl apply -f -
apiVersion: apps/v1
kind: Deployment
metadata:
  name: ingress-demo
  namespace: ingress-test
spec:
  replicas: 1
  selector:
    matchLabels:
      app: ingress-demo
  template:
    metadata:
      labels:
        app: ingress-demo
    spec:
      containers:
      - name: ingress-demo
        image: mcr.microsoft.com/azuredocs/aks-helloworld:v1
        ports:
        - containerPort: 80
        env:
        - name: TITLE
          value: "AKS Ingress Demo"
---
apiVersion: v1
kind: Service
metadata:
  name: ingress-demo
  namespace: ingress-test
spec:
  type: ClusterIP
  ports:
  - port: 80
  selector:
    app: ingress-demo
EOF
Lastly, deploy the ingress in the same namespace as the applications.
export DOMAIN_NAME="my-app.gaunacode.com"

cat <<EOF | kubectl apply -f -
apiVersion: networking.k8s.io/v1beta1
kind: Ingress
metadata:
  name: hello-world-ingress
  namespace: ingress-test
  annotations:
    kubernetes.io/ingress.class: nginx
    nginx.ingress.kubernetes.io/use-regex: "true"
    nginx.ingress.kubernetes.io/rewrite-target: /$1
spec:
  tls:
  - hosts:
    - $DOMAIN_NAME
    secretName: aks-ingress-tls
  rules:
  - host: $DOMAIN_NAME
    http:
      paths:
      - backend:
          serviceName: aks-helloworld
          servicePort: 80
        path: /hello-world-one(/|$)(.*)
      - backend:
          serviceName: ingress-demo
          servicePort: 80
        path: /hello-world-two(/|$)(.*)
      - backend:
          serviceName: aks-helloworld
          servicePort: 80
        path: /(.*)
EOF
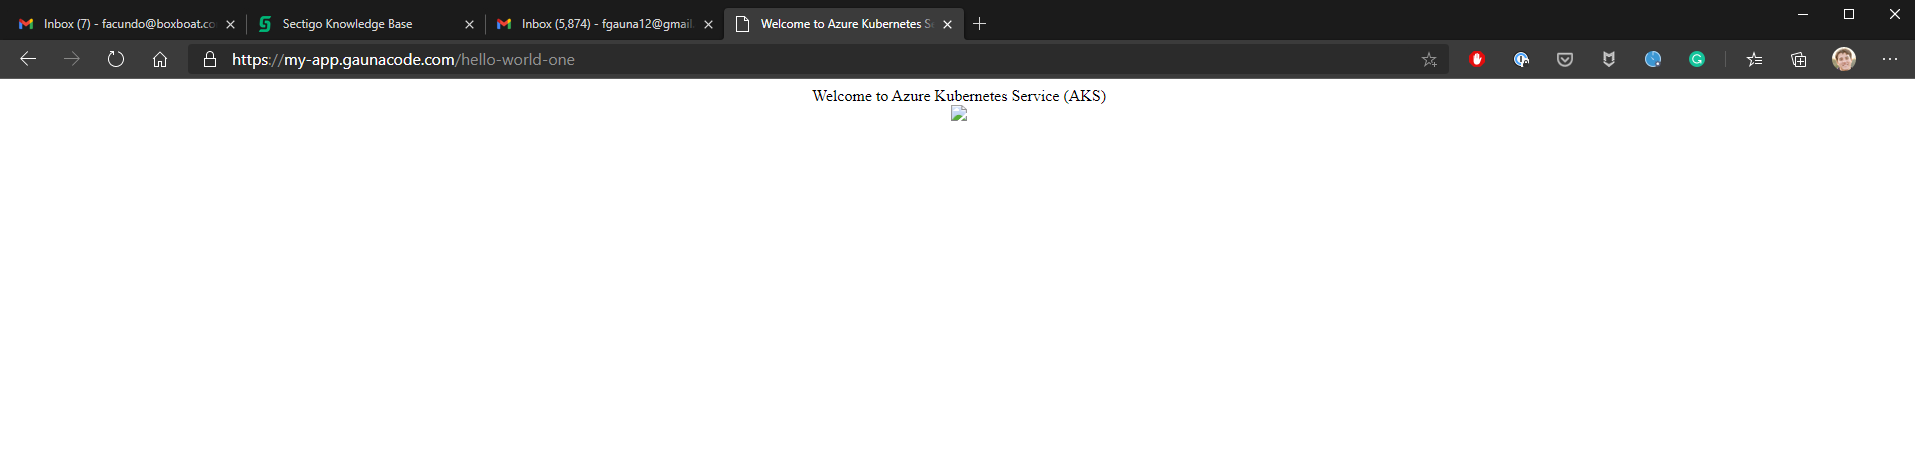
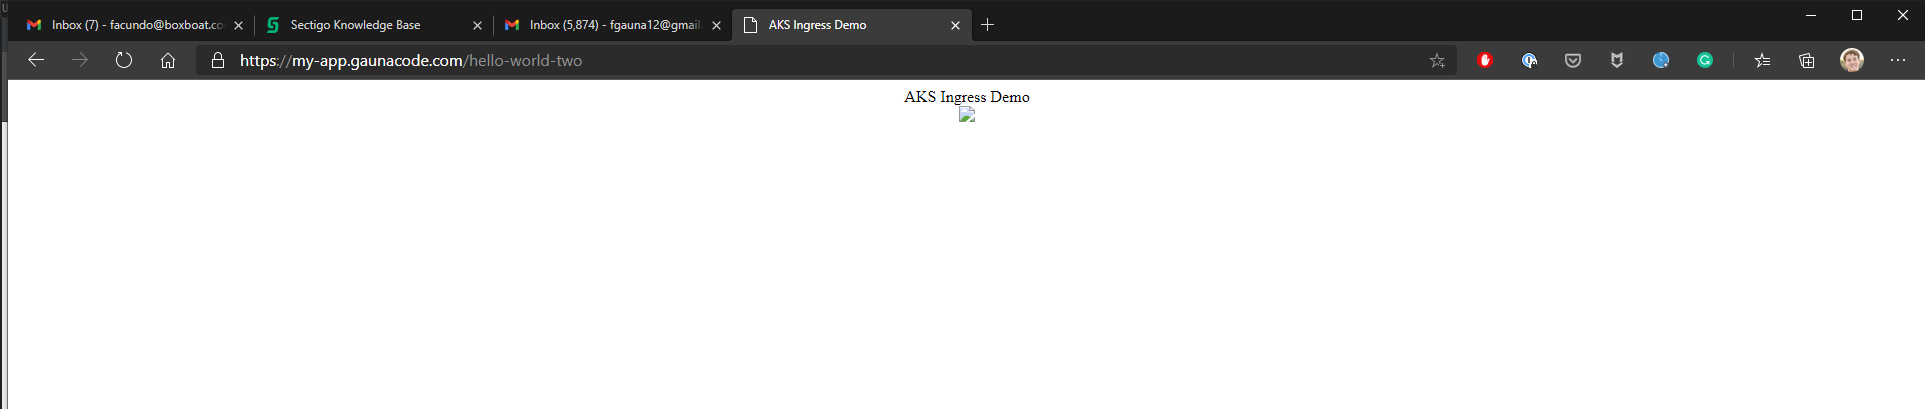
That’s it! Open the browser and navigate to the first app. The second application can be visited by adding /hello-world-two to the path.